Document looks good.
Change {{ editor.spellingErrors[editor.spellingErrorCursor].word }} to:


Title: Standard Form 180
Document ID: 0
Document Completed:
No Document History |
Title: Standard Form 180
Document ID: 0
Document Completed:
No Document History |

Your Session is already expired. Please login.
Standard Form 180, SF-180, or Request Pertaining to Military Records, is a one-page form, with additional two pages of instructions, that veterans of the U.S. military or next-of-kin of deceased veterans use to obtain military records, such as DD-214 Separation Records, or request a one-time replacement of medals earned in service. The military records obtained using the form may be used to prove service in the military and validate medical and legal status.
The next-of-kin of a deceased veteran may be his or her father, mother, son, daughter, sister, and brother. For individuals who are neither veterans nor next-of-kin and want to access military records, military personnel records are only available to the public 62 years after a veteran leaves the military.
The National Archives maintains the records of veterans. A person may request military records by sending SF-180 to its National Personnel Records Center (NPRC). The NPRC is the central repository of personnel-related records for the military and civil services of the United States Government. Submit the form to the following:
314-801-9195
National Personnel Records Center
Military Personnel Records
1 Archives Drive
St. Louis, MO 63138
314-801-0800
Requests from veterans or a deceased veteran’s next-of-kin may be filed online on the National Archives official website.
The response time for records requested varies, depending on the complexity of the request and the availability of records. According to the center, a follow-up request should not be made before 90 days have elapsed.
According to the National Archives, there are no fees for basic military personnel and medical record information provided to veterans, next-of-kin, and authorized representatives from Federal records. However, there are fees for records that are considered “Archival.” Archival records, or the records of service members who were separated from the military 62 years ago, are open to the public and subject to the public fee schedule. Archival requests require the purchase of the complete photocopy of the Official Military Personnel File (OMPF). The fees are as follows:
For requests that involve fees, the applicant will be notified as soon as a determination is made.
SF-180 is a one-page form with an additional two pages of instructions. It contains three sections that applicants need to complete. There are identifying information required to locate the records properly and accurately; thus, the applicant must provide as many details as possible. If there is no way to obtain the information for an item, one can write “NA,” meaning the information is “not available.”
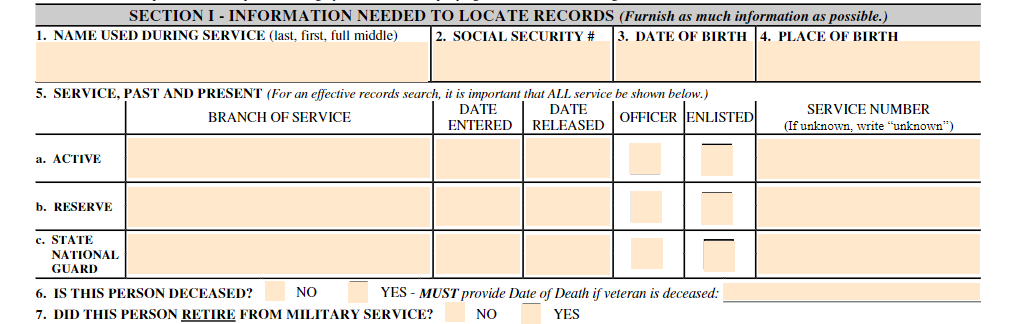
Section I — Information Needed to Locate Records
Box 1 asks for the veteran’s full legal name during his or her service.
Box 2 asks for the veteran’s Social Security Number (SSN).
Box 3 asks for the veteran’s date of birth.
Box 4 asks for the veteran’s place of birth.
Box 5 asks for the veteran’s service in the military, including the branch of service, the dates of admission to and release from service, if an officer or enlisted, and service number.
Box 6 asks if the veteran is living or deceased. If deceased, provide the date of death.
Box 7 asks if the veteran has retired from military service.
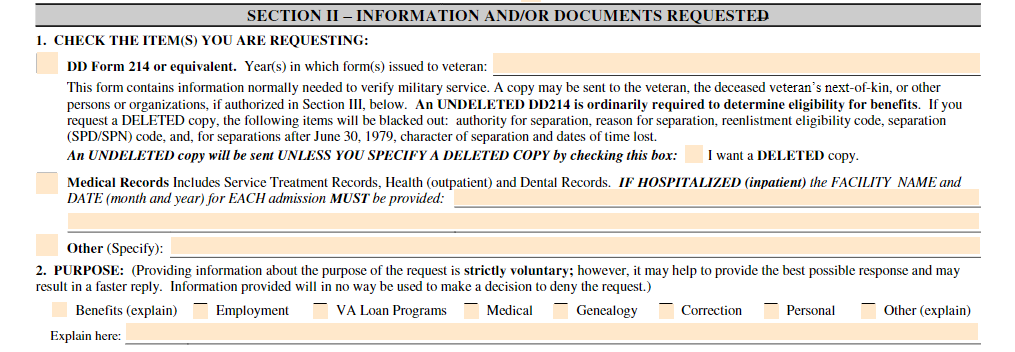
Section II — Information and/or Documents Requested
Item 1 asks for the items that the applicant is requesting.
Item 2 asks for the purpose of the request.
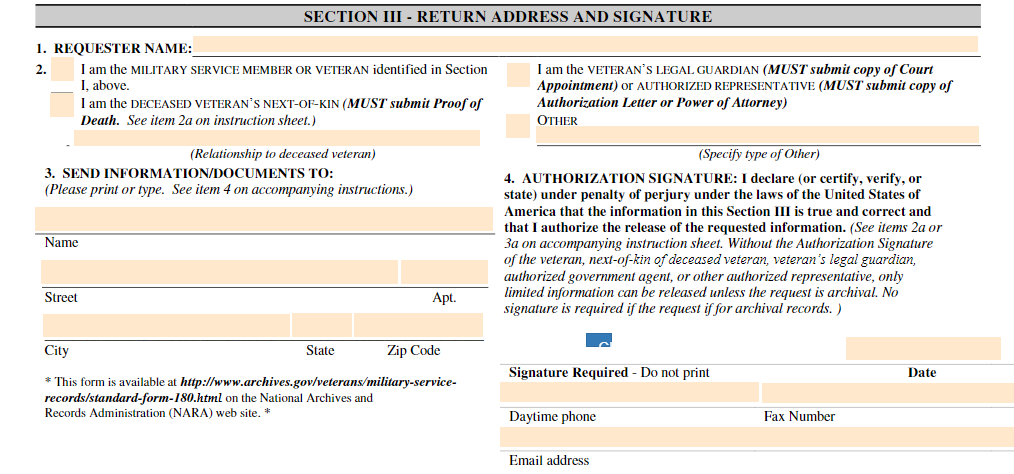
Section III — Return Address and Signature
Item 1 asks for the name of the applicant.
Item 2 asks for the applicant’s relationship with the veteran.
Item 3 asks for the address the information or documents will be mailed to.
Items 4 asks for the authorization signature, date, and contact information of the applicant.
Use the File button to access functions such as New PDF, New Page, Organize Pages, Save, Save As, Print, Export, Share Link, Email, and Postal Mail.
Use the Text button to add texts, numbers, and symbols to your document. To customize the texts, you will be able to access additional tools, such as the Bold, Italics, Underline, and Strikethrough buttons, the text alignment options, such as Left, Center, Right, and Justified buttons, the Bulleted List and Numbered List buttons, the Font Styles and the Font Sizes drop-down lists, and the Font Color and Font Highlight Color selection tools.
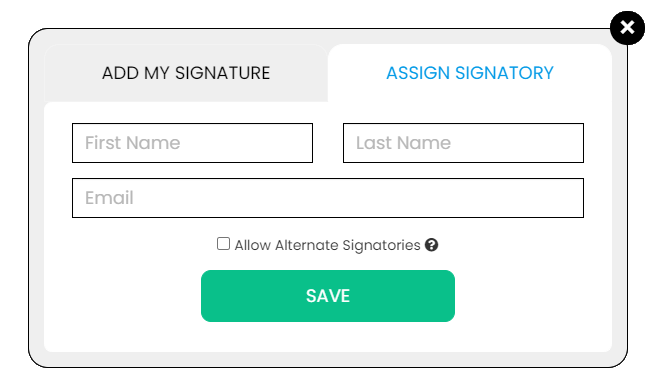
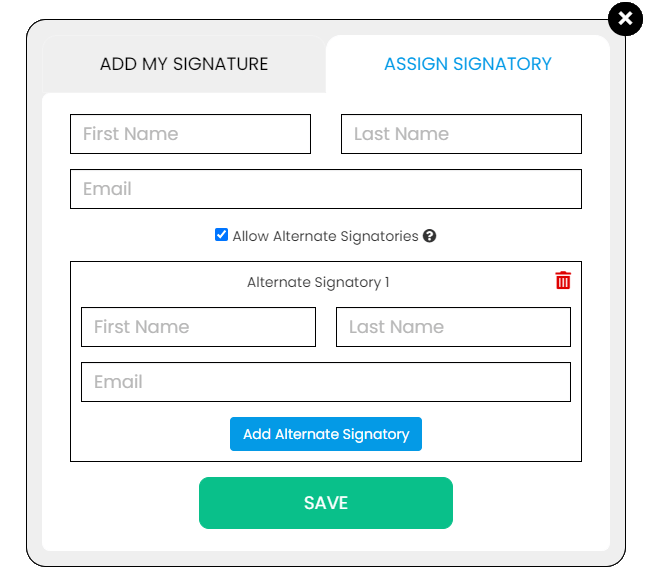
Use the Signature button to add a signature to your document and to assign a signatory. You will have the option to Type, Draw, or Upload your signature.

Use the Image button to add an image, logo, or photo to your document. The accepted formats are .jpg, .jpeg, and .png.

Use the Date button to add a date to your document. The default date format is MM/DD/YYYY, but you can modify it by typing the date format you prefer. Initially, it will display the current date, but you will be able to change it. To customize the date, you will be able to access additional tools, such as the Move text button, the Font Styles and the Font Sizes drop-down lists, the Bold, Italics, and Underline buttons, and the text alignment options, such as Left, Center, Right, and Justified buttons.
Use the Check button to add a check symbol to your document. To customize the check symbol, you will be able to access the Size adjustment tool.
Use the Cross button to add a cross symbol to your document. To customize the cross symbol, you will be able to access the Size adjustment tool.

Use the Whiteout button to white out or erase items in your document.
Use the Redact button to censor items in your document.
Use the Marker button to highlight items in your document. To customize the marker, you will be able to access the Color selection and Size adjustment tools.
Use the Insert button to add Icons, Header, Footer, Watermark, Comment, and Sticky Note to your document. The Icons button allows you select shapes such as Arrow Left, Arrow Right, Arrow Up, Arrow Down, Thumbs Up Thumbs Down, Question Mark, Exclamation Point, Circle, and Square; the Header button allows you to add a header; the Footer button allows you to add a footer; the Watermark button allows you to add a watermark by typing or uploading an image; the Comment button allows you to leave a comment in any part of the document; the Sticky Note allows you to post a note to any part of the document.
Use the Zoom button to zoom in and zoom out your document.
Use the Undo button to negate the last command done to your document.
Use the Redo button to reverse your last Undo.

Use the Help button to read instructions about how to use PDFRun’s online editor.

Use the Send for Signing button when you are done editing your document and you want to send it to another person for signing. You will need to provide the information of the recipient of your document to proceed.

Use the Email button when you are done editing your document and you want to send it to another person via email. You will need to provide the information of the recipient of your document to proceed.

Use the Download button when you are done editing your document and you want to save a copy of it to your device.

Use the Done button to finish editing your document.